Quick answer
Choose glue for a permanent, close-fitting joint with suitable bonding surfaces; screws when you need accessible mechanical fastening or later removal; and glued dowels when you want concealed connections and accurate alignment. A plain end-grain butt joint deserves more attention than a long-grain glue joint: improve its geometry or add an appropriate connection rather than simply adding more glue. These are starting points—not tested strength ratings for your project. (research.fs.usda.gov)
This guide covers small indoor organizers, boxes, and removable panels. It is not a design guide for seating, overhead storage, building components, or other applications where joint failure could injure someone.
1. Choose the joint before choosing the fastener
Start with three questions: Must this come apart? Will the connection be visible? Can you make the mating surfaces accurately? Write the answers on your sketch before buying hardware.
For the projects covered here, use this decision table as a planning aid:
| Task | Starting choice | Check before committing |
|---|---|---|
| Permanent organizer divider | Glued dowels, or a fitted groove with glue | Can you locate the divider accurately and assemble it without forcing it? |
| Small box with concealed corner connections | Glued dowels | Can your drilling setup produce matching holes without breaking through? |
| Small box where visible fasteners are acceptable | Screws, with glue only if permanence is intended | Are the screws suitable for the material and joint direction? |
| Removable back panel | Accessible screws without glue across the removable interface | Can the heads remain accessible and the screws enter suitable receiving material? |
These choices apply the handbook’s joint-design principles and the dowel manufacturer’s documented corner and T-joint applications; they are not interchangeable specifications for every box or organizer. (research.fs.usda.gov)
Do not start by asking which method is “strongest.” Start by sketching what touches what, where the fastener enters, and how you will assemble—or dismantle—the connection.
2. Identify long grain and end grain
Long grain runs along the wood fibers, including a board’s broad face and lengthwise edges. End grain is exposed where those fibers are cut across.
That distinction matters at a butt joint. Placing the end of one board against the face of another does not create the same bonding geometry as joining two lengthwise edges. The Forest Products Laboratory explains that plain end-to-edge-grain joints are difficult to design for appreciable loading; interlocking surfaces and increased bonding area improve the connection. (research.fs.usda.gov)
For a divider, consider a fitted groove or glued dowels instead of relying solely on its cut end touching a flat panel. For a box corner, decide how the connection will address that same geometry.
Screws do not make grain direction irrelevant. The handbook reports more variable withdrawal behavior for screws entering end grain than side grain. That is a reason to examine the layout—not to assign a universal holding capacity. (research.fs.usda.gov)
Practical check: draw arrows showing grain direction on both parts. Then mark the actual glue surfaces and screw paths. If your drawing reveals only a narrow end-grain contact, reconsider the joint before cutting.
3. Use glue with a realistic assembly plan
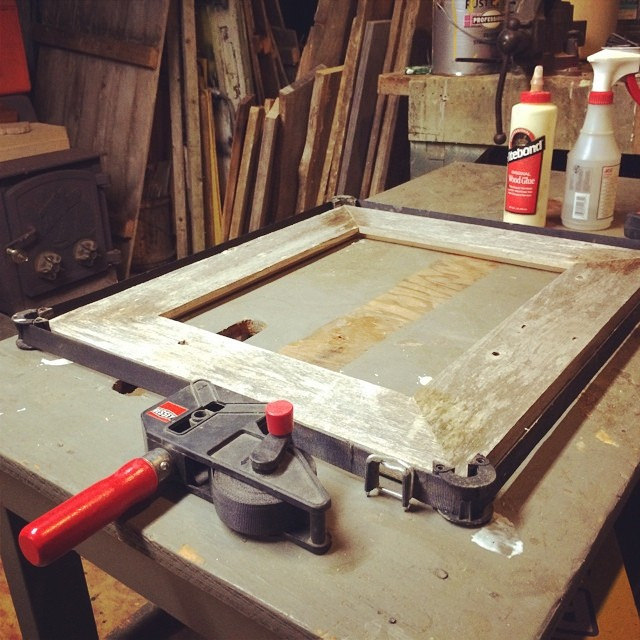
Before opening the bottle, put the parts together without adhesive. Arrange the clamps, check access, and rehearse the sequence. Treat this dry run as your opportunity to discover a missing clamp or an awkward assembly order.
Use clean, closely fitting bonding surfaces. Ordinary woodworking glue is not a substitute for correcting a poorly fitted joint. Clamping establishes contact, but excessive pressure that largely squeezes out the adhesive should be avoided. (research.fs.usda.gov)
Read the instructions for the exact glue, particularly its temperature limits and assembly times. For example, Titebond Original specifies:
- Open assembly time: 4–6 minutes.
- Total assembly time: 10–15 minutes.
- Those times apply at 70°F and 50% relative humidity.
- Application temperature must be above 50°F (10°C). (titebond.com)
Open time concerns bringing the adhesive-coated parts together; total assembly time includes completing assembly and clamping. Do not treat either as a universal stopwatch allowance under different workshop conditions. (research.fs.usda.gov)
Clamp time is also not permission to load the project immediately. Titebond’s general guidance recommends 30–60 minutes of clamping for unstressed joints, 24 hours for stressed joints, and no stressing of a new joint for at least 24 hours. Check whether your particular adhesive gives different instructions. (titebond.com)
If your rehearsal is too complicated for the available working time, simplify the sequence or select an adhesive with a documented longer assembly window.

4. Use screws with the right hole preparation
For screw joints, distinguish the holes by their jobs:
- A clearance hole lets the screw pass through the first piece.
- A pilot hole prepares the receiving piece for the threaded portion.
- A countersink accommodates a compatible countersunk head.
The appropriate sizes depend on the screw design and material. McFeely’s drilling guidance distinguishes traditional and production screws and provides separate hardwood and softwood pilot recommendations. Do not transfer one chart indiscriminately to a different fastener family. (mcfeelys.com)
Worked example: interpreting a pilot-hole chart
Suppose you have selected a #8 wood screw covered by McFeely’s chart. Its straight-pilot recommendations are 1/8 inch for hardwood and 7/64 inch for softwood. The useful lesson is the selection process: identify the screw, identify the receiving material, then use the applicable recommendation. Those diameters are not universal instructions for every #8 screw. (mcfeelys.com)
Before drilling the project, make a sample joint from matching offcuts. Check whether the parts meet, whether the wood splits, and whether the screw seats without damaging the material. This is a setup check, not a load test.
Check the screw’s path on your drawing too. Account for the first piece’s thickness, any head recess, and the receiving depth so the tip cannot emerge where it would cause damage. Do not use driving force to conceal a gap or poor alignment.
5. Use glued dowels when concealed alignment matters
A glued dowel joint uses pins seated in matching holes across the connection. Wolfcraft documents dowel joints for edge-to-edge, corner, and T-butt layouts, including concealed permanent furniture connections. Its drilling guide controls the drill direction and transfers matching positions to the second workpiece. (shop.wolfcraft.com)
That makes dowels a useful option for a permanent organizer divider or a small box where you do not want visible screw heads. It also makes drilling accuracy central to the job.
Prepare a simple dowel checklist:
- Mark each mating pair and its orientation.
- Establish the jig’s reference faces and edges.
- Confirm dowel diameter and length against the jig instructions.
- Set the drilling depth for each member.
- Check that the holes will not break through.
- Verify alignment before final glue assembly.
Wolfcraft’s guide specifically links drilling depth to board thickness and dowel length, allows space for glue, and describes using dowel markers to locate mating holes. Follow the instructions for your particular jig rather than assuming both members always need identical hole depths. (wolfcraft-prod.de)
Use the guide as intended: insert the bit into its bushing before starting the drill, avoid sideways pressure, and clear drilling debris as directed. (wolfcraft-prod.de)
If the parts will not seat during your assembly check, investigate alignment, hole depth, and debris. Do not reach for more clamping force as your first response.
6. Apply the choice to three common projects
A permanent organizer divider
Sketch whether the divider meets the base along a lengthwise edge or a cut end. For a concealed permanent connection, glued dowels offer a documented T-joint approach. A fitted groove is another geometry to consider when planning the project. (shop.wolfcraft.com)
Before final assembly, check the divider’s position against the items it must separate. Mark the intended orientation clearly so it cannot be reversed during glue-up.
A small indoor box
Decide whether the corners should be concealed or visibly fastened. Glued dowels suit a concealed corner layout; screws may suit a simpler layout where the heads are acceptable, provided the fastening arrangement matches the material and grain direction. (shop.wolfcraft.com)
Rehearse the complete assembly rather than checking each corner separately. Ask whether installing the last side will still leave access for your clamps or driver.
A removable back panel
Use an accessible mechanical connection and leave glue out of the interface you intend to separate. Position the screw heads where they will remain reachable after installation.
For a thin back, consider a layout in which screws pass through the panel into suitable receiving members rather than relying on the thin panel itself to hold the threads. Fastener performance depends on the receiving material and penetration—not merely the presence of a screw. (research.fs.usda.gov)
Before fastening, write down the removal sequence. If a screw becomes hidden behind another permanent component, revise the layout now.
7. Avoid combining methods without a purpose
Glue and dowels naturally work together in a permanent dowel joint. Glue and screws can also be combined, but decide what each contributes. Removing the screws will not turn a glued interface into a conveniently removable panel. (shop.wolfcraft.com)
Use these final checks before assembly:
- Fit: Have you corrected gaps rather than planning to fill them with glue?
- Timing: Is the dry-run sequence manageable within the adhesive’s instructions?
- Alignment: Are mating pieces and reference surfaces clearly marked?
- Drilling: Are pilot sizes, dowel depths, and screw paths appropriate?
- Access: Can you operate the clamps and driver—and later reach removable fasteners?
- Evidence: Are you treating the result as an untested project rather than claiming a load rating?
The most useful choice is the one you can explain on your drawing: suitable bonding surfaces for glue, an appropriate receiving member for screws, or accurately matched holes for dowels. If that explanation is unclear, improve the layout before adding another joining method. (research.fs.usda.gov)